

Friday, April 18, 2014
Guest Speaker Today: Academy of Art University

Thursday, April 17, 2014
Rhino: Wooden Box
Today we will be creating a wooden box using some basic shapes and tools:


 You can also separate the lid completely and add your box to another scene.
 Or you can make your box out of a cylinder for a similar effect.

First we will create a regular box [block] -- probably around 10" long by 6" wide.

Fillet the Edges of the box -- .5" for example.

Draw a straight line which you will use to cut through [Split] the box.

Separate the top of the box from the bottom.

Cap both pieces (top and bottom) to make solid objects.

Create a new box in the center (smaller than the other pieces) which we will use to cut out [Boolean Difference] the inside of the box.

Your finished box model should look something like this.

Next add texture and gloss. I chose a wood texture with a 50 gloss.

If you would like, click Explode and select individual pieces to texture, color, or adjust. In my case, I remove the texture, changed the color to black, and kept the shine at 50.

You can separate the lid from the base by sliding it to the side, leaning it against the base, or even rotating it at an edge to make it appear hinged.

Finally, add a base (i.e. a table) and lights. Finish by Saving, Rendering, Saving a JPEG, and uploading your finished project to your portfolio.


Wednesday, April 16, 2014
Rhino: Gold / Silver Ring
Today we are going to be creating a 3D ring, accurate to a specific ring size.
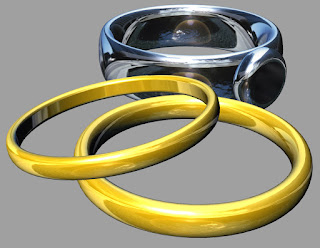 Next we will add a reflective surface to your ring.


- Begin by opening Rhino and selecting "Small Objects Millimeters".
- Select the "Circle" tool
- Enter 0,0 and press Enter
- Enter a ring size by using the chart (the mm for each ring size is indicated)
- Click the "Circle" tool again
- Enter 0,0 and press Enter again
- Enter the outer ring size to set the thickness of the ring and press Enter. Usually this is 2-3 mm more than you entered as the ring size. When you have finished, you should have two circles.
- Do a CTRL+A (Select All)
- Do a CTRL+C (Copy)
- Do a CTRL+V (Paste)
- Drag the selected circles up a couple millimeters (in the front or side viewport). This will be the width of the ring. In the render example (right) you can see two gold rings with different widths.
- Do a CTRL+A (Select All) again to select all 4 circles.
- Type "Loft" and press Enter.
- Select "Tight" in the pulldown bar, and check the box that says "Closed Loft".
- Press Enter -- and you should have a ring.
 Next we will add a reflective surface to your ring.
- Open the Material > Basic setting
- Select a base color for your ring (black if you want a silver/chrome finish or gold if you want a gold finish)
- Add a gloss of 50
- Under the Environment setting, add the reflecting sphere (below) image. This will give the effect of shiny chrome.
- You can adjust the "Intensity" of the "Environment" to allow the color to come through. For example, in the sample image above I turned the Intensity down to 50% so the gold shows, but I still get the reflection quality.
Monday, April 14, 2014
Rhino: Work on Chess Pieces
On Monday we began making a checkers set and on Wednesday we began making chess pieces. Today we will continue working on our chess pieces and getting them on a chess board. I would like you to feature your checkerboard / chess board on a table of some sort with a floor and walls. Remember that a large block makes the floor, another large block makes a wall, and another makes another wall, although you can feel free to add them to one of the tables in a room that you already created.
 Some specifics:
 Some specifics:
- Chess Pieces -- A full chess set includes:
- Pawn (8 of each color)
- Rook (2 of each color)
- Knight (2 of each color)
- Bishop (2 of each color)
- Queen (1 of each color)
- King (1 of each color)
Friday, April 11, 2014
Rhino: Create a few chess pieces
The plan for today is for you to create a few chess pieces. Basically you use one of the curve tools to draw a profile of the piece (just like we did with the vase/goblet/bowl) and then "Revolve" the piece. Instructions for the "Revolve" project are still on the board, but here are the basics:


- Draw a Curve Shape Profile
- Type Revolve
- Select the Curve
- Set the Beginning Angle to "0" (Press Enter)
- Set the Revolve for "360" (Press Enter)
If you aren't familiar with the shape of chess pieces, here's an example:

You can see that most of the shapes are done by revolving a profile and then using Boolean Difference to cut out a few shapes here and there. The biggest difficulty that I can see is the Knight (horse).
Here is my creation for a King and a Pawn. You can see my profile drawing and where I set the Axis (in red). Notice that my profile for the Queen is shown, but I added a Sphere to the top to make it look like a pawn.

There are many styles, sizes, and materials for chess sets so don't feel like you're locked into a specific design. Here are a few unusual examples:


Note: The hardest piece to do [in my opinion] is the Knight. I usually revolve the base and then add a shape to the top for the horse... although it doesn't HAVE to be a horse.
Here are some student examples:


Thursday, April 10, 2014
Rhino: Create a Checker Board and Checkers
Today we will be creating a checker/chess board using a series of squares of alternating light/dark wood. We will also be creating a border with a filleted edge.


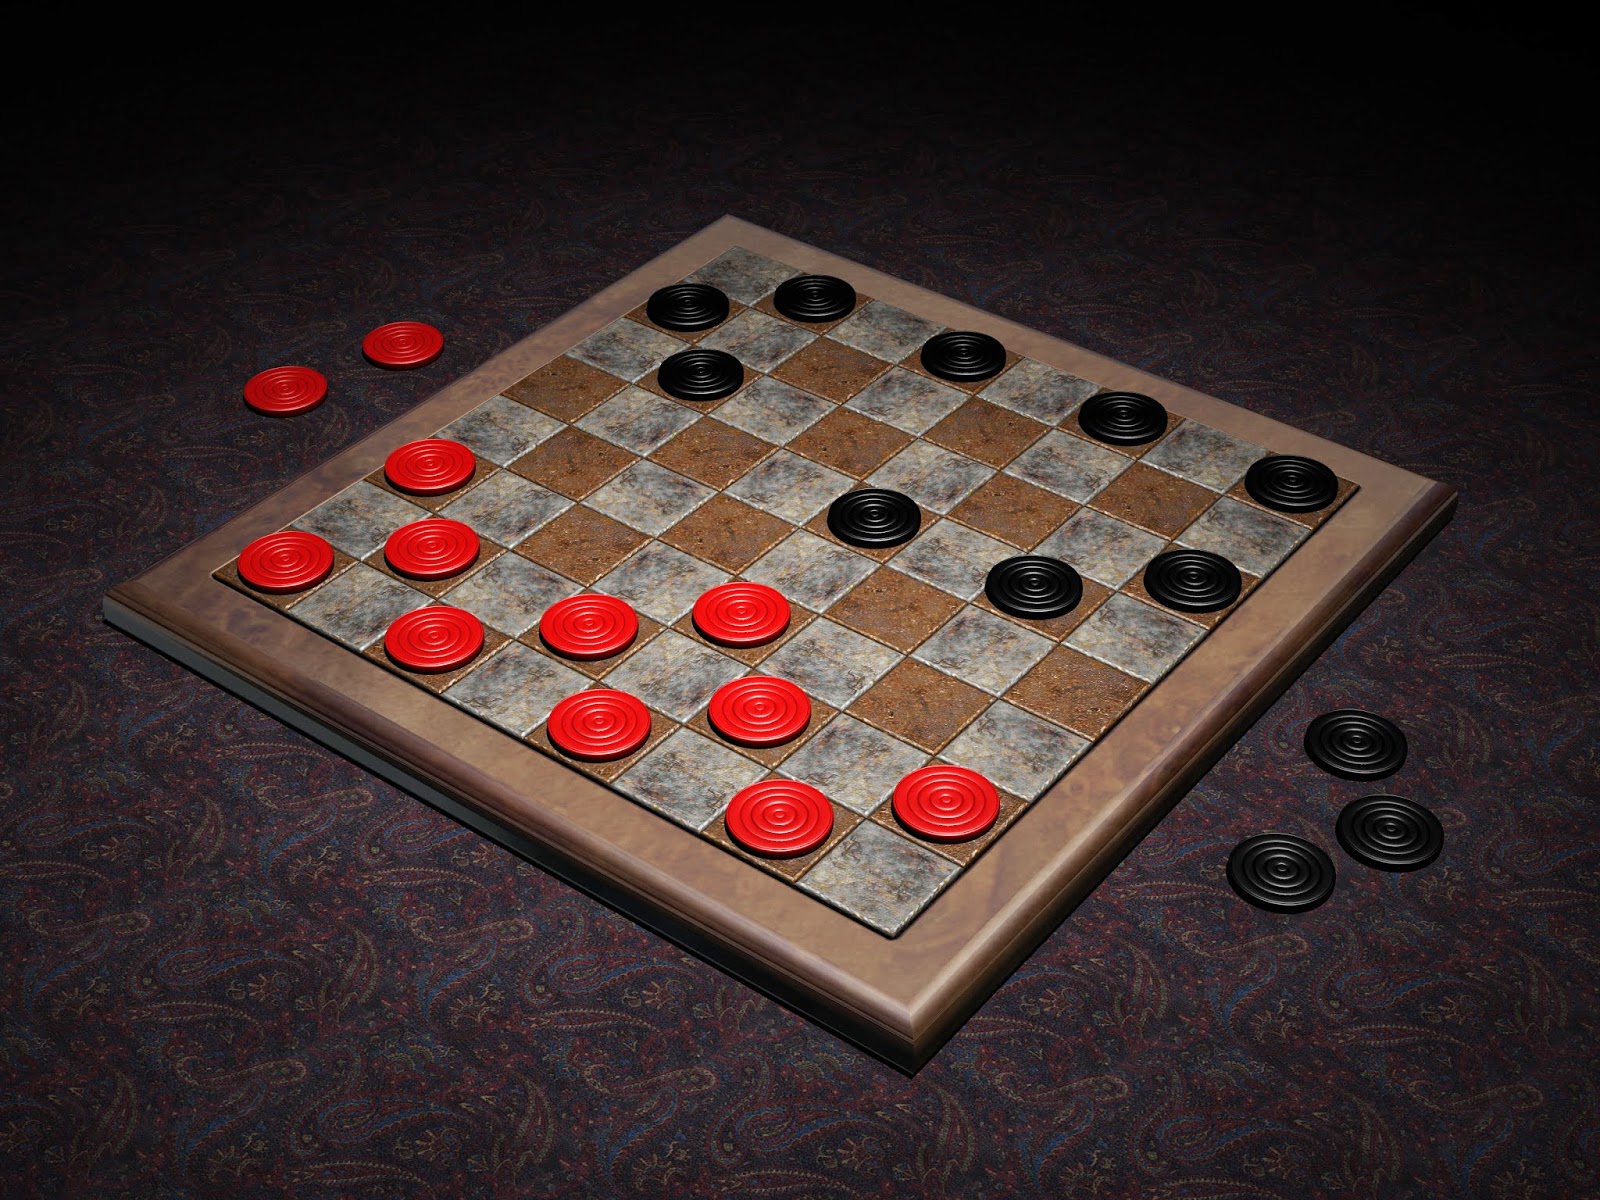 Next I would like you to add checkers. You can either create a checker with the Cylinder tool, or with the Revolve command (as seen in the examples below). Notice that there are 12 of each color and that they sit on the dark squares.

 Below are various styles of checkerboards including some that have been made into tables. Note the different colors, textures, materials, etc. Checkerboards can be made in stone, metal, wood, fabric, etc.


In the first step, I turned on "snap" and created two rows of 8 blocks. Then I changed the textures and alternated between light and dark.

In part 2, I copied the two rows and pasted them 4 times to create a basic checkerboard.

In part 3 I added a block that extended beyond the edges of the squares and lowered it just slightly so the squares stuck out of the surface.

In the final step, I filleted (rounded) the edges of the block (see above).
You can add texture, gloss, color, etc. and even lighting, background, etc.


Wednesday, April 9, 2014
Rhino: Flashlight Model
 Today we are going to be working through a classic Rhino tutorial -- we will build a flashlight.
Follow along with the text as much as possible and see what you come up with.
Here are the step-by-step instructions: [Click Me!]
Here are a couple examples created by students:


Subscribe to:
Posts (Atom)