Getting Started:
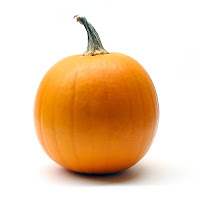
- Open the pumpkin picture (above) in Photoshop to use as the background for our creation (click the pumpkin first to view it full-size, then copy, open Photoshop, and paste).
- Select LAYER > NEW > LAYER (call this layer "mouth")
- Use the Polygon Lasso tool to draw the outline of a mouth
- Fill the polygon with black
- Select FILTER > DISTORT > RIPPLE (use a LARGE ripple so the edges aren't perfect)
Gradient Overlay:
- Select LAYER > LAYER STYLE > GRADIENT OVERLAY
- Choose STYLE > RADIAL
- Choose ANGLE > 0
- Choose SCALE > 100%
- Double-Click the Gradient Bar
- Set the "left triangle" to a bright orange
- Set the "right triangle" to a dark orange
- Click OK
- Select INNER SHADOW (from the LAYER STYLE menu)
- Choose BLEND MODE > COLOR BURN
- Choose OPACITY > 100%
- Click the "color box" and choose a semi-dark yellow
- Choose ANGLE > -90 (drag the line to the bottom)
- Choose SIZE > and around 2
- Set CHOKE to 100%
- Set DISTANCE to around 30 (you can adjust this to determine the pumpkins thickness)
Bevel and Emboss:
Inner Glow:- Select BEVEL AND EMBOSS (from the LAYER STYLE menu)
- Choose STYLE > EMBOSS
- Choose DIRECTION > DOWN
- Under Shading un-check the box that says "Use Global Light"
- Set ALTITUDE to about 25
- Choose HIGHLIGHT MODE > OVERLAY
- Set the OVERLAY to about 40%
- Set the SHADOW MODE to about 10%
- Select INNER GLOW (from the LAYER STYLE menu)
- Choose LINEAR DODGE (ADD)
- Change the color to a Light Orange
- Choose TECHNIQUE > SOFTER
- Set SOURCE to CENTER
- Set OPACITY to 60 or 70%
- Drag the SIZE up to 40-100 (depending on what looks best)
- Set the RANGE as desired
- Click OK
Other Effects:
Something Else to Try:- You can also add an OUTER GLOW (from the LAYER STYLE menu) I prefer a lower OPACITY (i.e. 10%) with a larger SPREAD and SIZE. You can modify any settings as you desire.
Create the Eyes:
- Create a new layer (LAYER > NEW > LAYER) called "eyes"
- Use the Polygon Lasso tool to draw the outline of an eye
- Fill the polygon with black
- Use the Polygon Lasso tool to draw the outline of the other eye
- Fill the polygon with black
- De-Select everything (CTRL+D)
- Select FILTER > DISTORT > RIPPLE (use a LARGE ripple so the edges aren't perfect)
- Right-Click the "mouth" layer and select COPY LAYER STYLE
- Right-Click the "eyes" layer and select PASTE LAYER STYLE
- Double-Click the fx indicator on the "eyes" layer to edit LAYER STYLE
- Select INNER SHADOW and Un-Check the "Use Global Light" button.
- Drag the pumpkin picture to adjust the shadow/thickness of your pumpkins eyes
- Try pasting these LAYER STYLE effects to a black Text layer
- Try copying a pumpkin carving pattern, pasting it onto your pumpkin, deleting the white area, and applying your LAYER STYLE
After you have your layer styles all set up you can try using a different background. If you start with a different background layer the effects may not come out correctly. Here are a few that you might try:


No comments:
Post a Comment