
There are really two different approaches to this project:
- Using two separate pictures to create a foreground and background
- Using the same picture and separating objects from the foreground and background by making a copy of the image and erasing the background from the foreground image.
In the example below, the Jellystone background was offset and the Yogi image was static -- making Yogi appear to be in front of the background (with red/cyan 3D glasses)


Next...
- Select the "backdrop" (Jellystone in this case) layer
- Select All (CTRL+A)
- Copy (CTRL+C)
- Select the CHANNELS tab
- Select the Blue and Green channels (click blue and then shift-click green)
- Paste (CTRL+V)
- Click the "channel visibility" box (where the eyeball should be) to show RGB channels
- Click the Move Tool (Black Arrow)
- Press the Right Arrow (on the keyboard) a few times to offset the blue/green from the rest
- Look at your image in 3D.

Example 2: One Picture into 3D
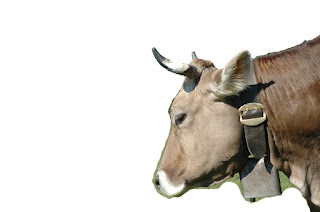
I wanted a picture that would demonstrate the difference between foreground and background -- and I found this cow:

Next I erased everything except the foreground. Don't look too closely -- I did it as a quick example in class:
Next...
- Select the "backdrop" (hills in this case) layer
- Select All (CTRL+A)
- Copy (CTRL+C)
- Select the CHANNELS tab
- Select the Blue and Green channels (click blue and then shift-click green)
- Paste (CTRL+V)
- Click the "channel visibility" box (where the eyeball should be) to show RGB channels
- Click the Move Tool (Black Arrow)
- Press the Right Arrow (on the keyboard) a few times to offset the blue/green from the rest
- Look at your image in 3D.

In this iconic image from Star Wars, I wanted to separate "layers" -- in this case, I wanted a background (the tunnel), a middle ground (Darth Vader) and a foreground (those pipes in the front).

The following pictures show the foreground, middleground, and background pictures that I used to create the final 3D image:


- I placed the foreground on the top layer (no channel offset at all)
- I placed the middleground in the middle layer (offsetting the green/blue channel a couple "clicks" to the right)
- I placed the background behind the middleground and offset the green/blue channels several "clicks" to the right.
The final copy shows the 3 layers in anaglyph 3d:
Here are some other examples:


No comments:
Post a Comment