REMEMBER:

•  Add your name to your projects
•  Save Photoshop projects as PSD and JPG
•  Save Bryce projects as BR7 and [Save Image As] JPG
•  Save Sculptris projects as SC1 and JPG and export it as an OBJ.
•  Save Rhino projects as 3DM and JPG
•  Save Flash projects as FLA and go to FILE>PUBLISH SETTINGS and publish as SWF and JPG
•  Upload finished projects to your portfolio and/or your DeviantArt page
•  Keep checking your grade on PowerSchool
DOWNLOADS:
Download Bryce 5 Trial Version
Download Sweet Home 3D
Download Rhino 3D 5.0 Trial Version
Download Sculptris
Download Windows Movie Maker 2.6
Download Java JDK
Download Greenfoot

Thursday, February 13, 2014

Bryce: Lake / Pond Scene

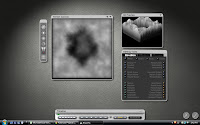
Today we will use the Bryce Terrain editor to create a lake scene:
  • Insert a Terrain
  • Paint the entire Terrain with a dark gray (very low elevation)
  • Use the soft-edged, smaller brush on the lowest (black) elevation to paint a lake shape
  • Exit the Terrain editor (check mark) to view your new Terrain
  • Click EDIT and drag the Y Axis (Resize) down to flatten your terrain
  • Add a Water Plain and use the  Y Axis (Reposition) to move the water to the appropriate level (so that it shows inside your lake cut-out but doesn't cover the entire Terrain
  • Add finishing touches (additional Terrains for background, adjust textures, change your sky, etc.)
When finished:
  • Save As (as a .BR7 file) to your Thawspace
  • Render your picture
  • When finished Rendering, "Save Image As" and  select JPEG
  • Upload your JPEG to your portfolio blog

No comments:

Post a Comment