REMEMBER:

•  Add your name to your projects
•  Save Photoshop projects as PSD and JPG
•  Save Bryce projects as BR7 and [Save Image As] JPG
•  Save Sculptris projects as SC1 and JPG and export it as an OBJ.
•  Save Rhino projects as 3DM and JPG
•  Save Flash projects as FLA and go to FILE>PUBLISH SETTINGS and publish as SWF and JPG
•  Upload finished projects to your portfolio and/or your DeviantArt page
•  Keep checking your grade on PowerSchool
DOWNLOADS:
Download Bryce 5 Trial Version
Download Sweet Home 3D
Download Rhino 3D 5.0 Trial Version
Download Sculptris
Download Windows Movie Maker 2.6
Download Java JDK
Download Greenfoot

Wednesday, February 12, 2014

Bryce: Island Scene

Today we will be using Bryce to create a basic island.  You will need to include some of the basics here including the flat plane, the "mountain" terrain, and water.  We will also be editing the "mountain", changing textures, and adjusting the sky/environment.  I will give some specific direction for this project in class.

SET UP BRYCE:

Go to: \\JHS-LAB-M16\Users\LabSoftware
Run: br_ap003_Bryce55

What I would like from you is the following:
  • Change the texture of the first Plane
  • Add a "Mountain" (Terrain)
    • Adjust it so it sinks slightly below the Plane
    • Edit the Terrain (click the "E")
      • Adjust the shape of the mountain
      • Add some Erosion
    • Change the texture of the Terrain
  • Add a Water Plane
    • Edit the texture of the Water
  • Change the Sky
    • Be creative and adjust fog, haze, colors, etc.
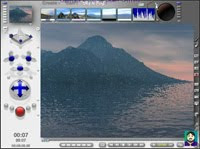
Also, if you would like to view a "video tutorial", I am including one below [if you can view the video inside the schools firewall].

No comments:

Post a Comment