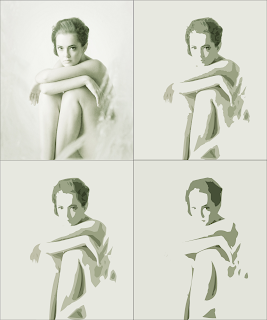
 Typically I begin by either importing the graphic to my stage or pasting the graphic onto my stage. Then I go to Modify > Document and change the Document Properties to match the Contents. All that does is makes my "stage" the same size as the picture on the stage.
I also give it a Title (and sometimes a description) at this point as well. You will also notice the Frame rate -- which is something we will be using later when we get to animation.
Next I go to the Modify > Bitmap > Trace Bitmap menu so I can trace my image. Here I can adjust the color threshold (smaller numbers are more detailed) and the minimum area (again, smaller numbers give higher detail). You can also adjust your Curve fit or the Corner threshold to smooth the graphics out.
 I used various settings on this example image to get more or less detail and to smooth out what I have.
In the Eagle example I traced the outline by hand with a black paintbrush, but did a "Modify > Bitmap > Trace Bitmap" to pull out some feather details. I also added in some of my own details (using the paintbrush) to make it appear more hand drawn.
 Finally I traced a flag using the Trace Bitmap option and placed it behind the Eagle.
Because this project can be done in a number of seconds, what I want you to do is create several different images using different settings and then choose two good example to upload to your portfolio.


No comments:
Post a Comment